Recently a kindergarten teacher asked me to make a circle map in a notebook for a lesson. She wanted two maps and pictures to put on each map so students could choose the main idea of the pictures. Here is how I made it:
1. Create circles by clicking on the shapes tool and then choosing the circle tool.
2. Draw the circles on the page. Click on the circle to move and resize.
3. Choose pictures by going to the images screen and typing in your keywords in the
search box. Under the pictures option will be the pictures SMART notebook found. Double click the image or drag it to insert it on your page.
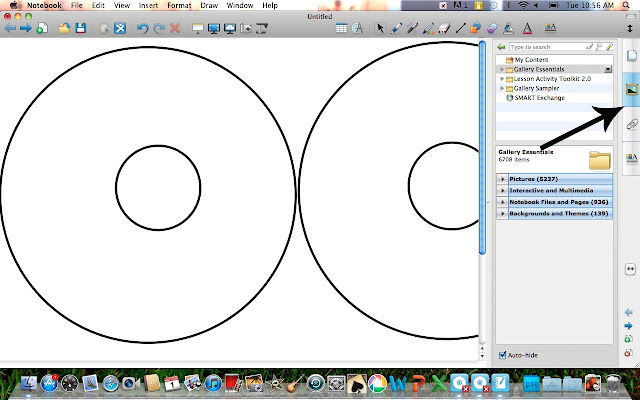
4. You can click on the image to resize and relocate it on your screen. In my final product I also changed the background colors. When you are ready to use it, students can click and drag the pictures to the appropriate map and write the main idea on the inside circle. Simple, but fun!
For information on changing the background color, go
here.


No comments:
Post a Comment